Not for the Faint of Heart
Sunday, January 2, 2022
Thursday, February 4, 2021
I asked my friend from Bulgaria to share with me some authentic recipes from her home country.
She told me that they eat a lot of feta cheese and yogurt.She also informed me that I only need to look at the side of the yogurt container at the culture to get an idea of how much yogurt they eat. The ingredients list milk and lactobacillius Bulgarius, The bacteria that converts milk into that lovey, sour health-filled treat gets its namesake from the country of Bulgaria.
Homemade yogurt is simple and easy to make.. There are many turorials but this is the one that I find the easiest and most effictive.
You will need 1 quart of milk and 2 tablespoons of plain commercial yogurt or starter culture.
If you have an insta-pot it could not be easier. Simply pour the milk into the insta-pot and set it to the boil/saute setting. You can also use your stove top, Heat the milk up to 180 degrees and remove from the heat. Allow the milk to cool until it reaches between105 and 110 degrees. When the milk reaches it's target temperature add the yogurt or starter. If you are using the insta-pot then simply press the yogurt button and allow it to sit for 8 hours.
If you are using the stove top pour the milk into a quart mason jar with the starter. Keep it in a warm place like the stove on breadproof setting, by a heater or fireplace or wrap it in a warm blanket for 8 hours.
When the yogurt is done culturing you can store it in the refridgerator for up to a month.
Enjoy your yogurt with your favorite recipe, sweetened with a little honey and fresh fruit for breakfast, or on it's own for an anytime snack,
Tuesday, June 4, 2019
Paper Making with Plants
With that I am planning activities to augment or homeschooling and keep us active and curious for the next few months.
My first line of business is a business.I have long enjoyed soap-making as a hobby and sold some when we had our farmers market booth. I have always wanted to incorporate the kids in to process of making, branding,and selling our home made soap(for those of you new to my blog I am a mother of 6)with my youngest age 4 I feel they are all old enough to help.
So the first step in my effort began a few days ago when we made the home made paper with which we will wrap our soaps.
Paper making is a fun and educational experience incorporating recycling and nature craft.
We used brown paper wrapping,old cotton and linen napkins, and our leggy lemon balm and mint plants to make the pulp.
Outlined is the process we used-
Materials-used paper, a mold,a blender, a container for the pulp and old towels blankets or sheets
any used paper will do,junk mail,tissue paper,napkins or brown paper bags
to make about 3 8-10 sheets you will need about 10 ish sheets of used paper or 1 brown paper bag
optional- plant fibers including 100% cotton or linen rags, leaves flower petals, or herbs
To make a mold you need a frame (an old wooden picture frame works well or an embroidery hoop for circular sheers) to which you've attached a screen to.
The first step to make paper is to make a pulp out of your chosen materials. You must chop plant materials very finely,and tear paper and rags into tiny pieces. If the pieces are too large they will get stuck in the blades of the blender.
After the materials are prepared ,put them into the blender with half their volume of water. Process them an high until the pulp is a smooth muddy consistency. No big chunks should remain.
When all the material has been made into pulp dump it into your container.
Next you put your mold into the pulp and gently slosh it side to side, Pull it up and allow the water to drain off.
The next part requires a bit of patience and practice.
Carefully put your paper sheet face down on your towel or blanket,press the water out gently with your hands or a sponge and lift off the mold.
Allow to dry in the sun for a few hours and voila you have beautiful hand made paper, worthy to wrap soap, make home made cards or crafts with.
Admittedly, this project was more as fun for me than was for the kids which is saying a lot. They really enjoyed it but it was such a hot day that pretty soon I was struggling to keep Fulton from plunging into the watery pulp. I let them all play in the hose while I finished making all the paper that I could from the pulp,which should be enough to wrap about 20 bars of soap.
Tomorrow we will make soap and hopefully in two weeks we will debut " Little Elves Soap" to the flea market along with other up-cycled goods.
Until then we will enjoy the beautiful June weather and dream of fun activities to come.
Saturday, June 1, 2019
My Year With Nature- A New Beginning
This is my challenge-
Month by month I will share my experiences and my ideas as I glean nature's
seasonal offerings.
Saturday, October 4, 2014
So here it is October and the leaves are beginning to fall. The highs tomorrow are supposed to reach a whopping 65 degrees.
The summer found me way to busy to blog ,but here I am with a little spare time and a lot to write about. Here is a small excerpt from a draft that I never finished. As you can see I never made it past 7a.m....
It has been over a month since my last post. As every gardener knows this is the time of year where you work half days... A full 12 hours at least. Tonight I was going to fold my leaning tower of laundry but my most wonderful husband reminded me that I had been working since 6 and here it is 9. The laundry can wait another night.
Today I canned 50 pounds of tomatoes and made cheese from 5 gallons of goat milk. Yesterday ,our family harvested vegetables,made fig preserves,and pickled peppers. We also canned the pickles we made last week. Each of these topics deserves their own blog and I will get to it eventually. Today I want to give you an idea of what a day on our farm looks like during peak season.
6 a.m. -cock-a doodle-do,literally over and over again. No need for an alarm time to wake up.
The goat is bellowing as I prepare my milking supplies. I am scrupulous about the cleanliness of my milk since we drink it raw. I scrub and boil the pail and anything that comes in contact with it.6:30 it's outside with the goats. Feeding,brushing, and milking my two goats takes about 30 minutes.
This morning however we were trying to coax pigs back into their pens as my oldest son forgot to turn on the electric fence last night....
we canned. Our pantry is now filled with hundreds of jars pickles, pickled okra, pickled peppers, watermelon rind pickles,roasted red peppers, tomato sauces, ketchups, and preserves of all kinds. We have 5 gallons of homemade vinegar, 3 gallons of tomato wine, and 3 gallons of water melon wine. We are fermenting 7 gallons of hot sauce and have a half a bushel more of hot peppers in the freezer. We have a freezer full of veggies, and to top it off we picked up our pig from the butcher today. My grandmother always told me that you can use every part of the pig excepting the squeak.With that in mind, we volunteered to accept any organ meat that was not wanted from our customers. I have two huge bags full.
So this week begins my adventure in whole beast eating. A few years ago I experimented with head cheese, with that under my belt, salted dried pork liver should be a breeze.
Wednesday, July 2, 2014
Summer Sun Protection
So what's a farm girl to do? Figure out how to make it for herself!
One of the main ingredients in natural sunscreens is zinc oxide. It works by absorbing UV radiation and converting it to infrared heat which is harmlessly evaporated from the skin. It is very effective and a little goes a long way. When I was young my friends and I used colored zinc or diaper rash cream for sunscreen.As an adult I don't find "war paint" as cool as I did when I was eight. Fortunately, micronized zinc can be purchased from a few online sources. I found mine at www.soapgoods.com. I purchased a pound about two years ago and have made sunscreen probably a dozen times.
Sunscreen is very easy and cost effective to make at home. you need only 4 ingredients, oil, beeswax,zinc oxide and water. An immersion blender is a helpful tool but not 100% necessary.
I like to add green tea instead of water because green tea is supposed to be good for your skin and have anti-cancer compounds, again, I am no doctor but it can't hurt. Green tea turns lotion a strange color that may be less than appealing however,it is completely transparent when it is applied to skin.
Most recipes call for a combination of olive,coconut, and a few other oils.. I have found that I like the feel of avocado,or olive and coconut oil.
To make about one quart of sunscreen you will need-
1 cup olive(or almond,grapeseed,or avocado)
1 cup coconut oil
4 tbs beeswax shredded
1 cup slightly warm water or green tea
2-4 tbs zinc oxide powder
Procedure-
Fill a large pan with water and place on burner.
place a saucepan inside the larger pan.
To the saucepan add the oils and wax.
Warm the oil and wax until the wax is fully melted.
If you are using an immersion blender,
place it into the wax/oil mixture and turn it on low.
If you don't have an immersion blender you can pour the mixture into a standard blender(be forewarned however, that standard blenders are very effective albeit very difficult to clean.)
You can also use a whisk and hand mix the sunscreen. I find that often times the water is hard to incorporate by hand so my method of choice is definitely immersion blenders.
Add the water or tea in a steady trickle to the wax/oil mixture. when the lotion base is well incorporated add the zinc. More zinc will give a greater spf.( Two tablespoons provides about spf 15.)
When all the ingredients are incorporated, pour the mixture into clean jelly size mason jars.
To clean the cookware, wipe out as much of the residue with a rag or paper towel. then pour boiling water on everything and wipe again. Repeat the rinsing and wiping until all residue is gone.
The sunscreen is best stored at cool temperatures or refrigerated if it is not to be used immediately. It can be stored unopened in the fridge for at least 6 months but once it is opened it should be used or discarded after 2 weeks.
This recipe is best reapplied after swimming or sweating. I usually reapply it every hour.
Remember that sunscreen is only one defense against sunburn and potential skin cancer.
Here are some additional precautions to take-
Wear white, longsleeve clothing, and a wide brim hat.
Avoid the midday sun if possible.
And eat a diet rich in antioxidants.Green tea has been reported to help prevent skin cancer so sipping a nice glass of iced green tea can't hurt.
Thursday, May 22, 2014
Herbal Bug Repelent
I always question the long term safety of deet based repellents and even if they are proven safe, the smell is just nasty.
Health food stores sell many all natural repellents that are effective and smell pleasant however they are all expensive.
Tick season is at it's peak and the wisdom of God is such that the very herbs that repel insects are now ready to be harvested. Most likely you have an "weed" or two growing in your yard that can be used to ward off skeeters, ticks, no see ems and other pesky bugs.
A simple repellent can be made
crushing the fresh leaves of
mint, basil,and/or lemon balm.
|
The list of insect repellent herbs is exhaustive.
A few of the most common include:
Artemisia/wormwood
basil
bay
catmint
cedar
citronella
clary sage
coriander
elderflower
fleabane
ginger
juniper
eucalyptus
frankincense
geranium
juniper
lavender
lemon balm
lemongrass
mints
pennyroyal
rose geranium
rosemary
rue
sage
sandalwood
thyme
vanilla
yarrow
There are many ways to make repellents.
1.You can do it my husbands way and drink it. Apple cider vinegar and garlic are the most commonly recommended internal remedies. If you are brave enough to try herbal brews consult the book Sacred Herbal Healing Beers. Remember the evidence for effectiveness and safety is purely anecdotal.
2. Tinctures are effective ways to extract the active constituents of herbs.Tinctures are simply herbs soaked in a solvent, usually alcohol or vinegar.
3. Essential oils are highly effective albeit expensive insect repellents.
Here are 4 recipes to get you started. Remember, be creative and feel free to experiment.
Garlic and Apple Cider Vinegar Tick Drink
In a quart mason jar crush a clove of garlic. Add 2 tbs apple cider vinegar,preferably organic unfiltered.
Allow the mixture to steep for 1 hour. Next add a tbs honey or more to taste. Then fill the jar up with fresh water.
Hold your nose and drink up!You can also rub it on your skin without the honey.
The results should last as long as you can still taste the garlic.
Unfortunately, bugs may not be the only thing you repel!
Everclear Bug Be Gone
1 handful yarrow leaves
1 handful fresh mint leaves
1 tbs dried basil ( it's not in season yet)
5 bay leaves
1/4 cup juniper berries or cedar berries
Place all ingredients in a quart mason jar. Cover the herbs with Everclear or another clear flavorless alcohol. You can use isopropyl alcohol but it tends to dry out skin.
Allow the mixture to steep for at least a week.
Gently swirl the mixture every few days.
When the tincture is made strain it through cheesecloth into a clean mason jar. Add 1/4 cup per quart of water. Place in a sprayer and use like store bought spray.
You need to reapply every few hours or after sweating and swimming.
Herbal Tea Bug be Gone
Essential Oil Bug Repellent
rose geranium essential oil
citronella essential oil
lavender essential oil
eucalyptus essential oil
or a combination of three from the list above
olive/grapeseed/almond oil
Fill a pint jar with a carrier oil such as olive.
To it add 10 drops of each of the chosen oils.. You may add more if you want a stronger fragrance but do not exceed 75 drops.
To use, dip a cotton ball into the oil. Dab it onto the backs of your legs and wrists.
This is very long lasting.Reapply after swimming or sweating.
Thursday, May 8, 2014
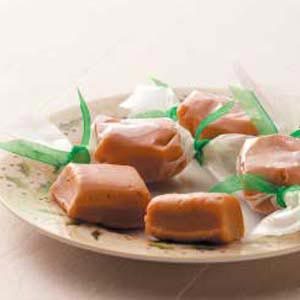
Sweet Treats
My daughter shares this love of candy making and I often find her experimenting on her own.
The truth is that I find candy making in some ways easier than baking, and as the weather gets warmer who wants to heat the whole house up with the oven.
Unfortunately, I am under no delusions that any of my candy recipes are healthy they contain only natural ingredients.
To start making candy, the one thing that I strongly recommend is a candy thermometer. The one that I have has the candy making terms written next to the corresponding temperature, for example soft ball which is the temperature used for fudge making is 240 degrees.The only other thing you need is a pot or sauce pan.
So here are two of my favorite recipes-
Honey Sesame Taffy
I adopted this recipe from Jewish Halva or Sesame Fudge.
It contains 2 ingredients.
Honey- 2 cups
Sesame Tahini 1 1/2 cup
First, line a loaf pan with parchment paper.
Rub the parchment with a little butter.
Next, heat the honey on medium heat to the hard ball temperature of 260 degrees
Meanwhile, in a separate pan warm the sesame tahini in a separate pan to between 100 and 110 degrees.
(this temperature does not have to be exact)
When the honey reaches 260 remove it from the heat and add the tahini, whisking it continually.
When the honey and tahini are thoroughly combined, pour the mixture into the prepared loaf pan.
When the taffy feels cool score it with a sharp knife. It will take about an hour to cool thoroughly, at that time you may remove it from the pan and place it in an airtight container or eat it.
Peanut Fudge with Chocolate Chips
This recipe is similar in process to the sesame recipe except I use sugar and don't cook it quite as long.
Ingredients
1 cup chocolate chips
1 cup white chocolate chips
1 cup peanut butter
2 cups sugar
1/2 cup milk
1 tsp vanilla
First, sprinkle the chocolate chips onto a 9x5 baking pan.
Next, in a saucepan, mix milk and sugar until sugar begins to dissolve.
Cook the sugar mixture on medium stirring occasionally until it reaches 240 degrees soft ball phase.
While the sugar is cooking warm the peanut butter on low to between 100 and 110 degrees.
Add the vanilla to the peanut butter and stir well.
When the sugar mixture reaches the correct temperature remove it from the heat and add the peanut butter mixture. Whisk until thoroughly incorporated.
Pour the mixture over the chocolate chips. Allow about an hour for the fudge to cool.
Enjoy!
Monday, April 28, 2014
How to Kill a Catfish
While many urban and suburban never have the opportunity to raise and butcher their own meat, most people have been fishing,even if just to cast a line and relax by the water. Cleaning fish is a good introduction to processing your own meat. So If you are not squeamish keep reading and I will show you how to clean a catfish.
I'll start with a recipe for fried catfish just in case you opt for store bought fish filets.
Cornmeal Fried Catfish
2 filets per adult
1 per child
enough buttermilk to soak fish
enough cornmeal to coat fish
about a teaspoon cayenne pepper per 2 cups
Instructions-
Soak fish at least an hour up to overnight.
Dredge fish in cornmeal mixture.
Meanwhile, heat peanut oil in a deep skillet or
deep fryer. Cook fish for about 5 minutes per
side.Allow to drain on brown paper.
Eat hot with biscuits or hushpuppies.
Springtime is a wonderful time of year to fish. Our pond is teaming with catfish, bluegill and ,I suspect, bass. My children caught 27 fish last week. I let them keep about 10 which we fried up on Friday.
If you have a teenage boy(or girl) you can put him in charge of the whole process, he'll probably beg for the opportunity.
First, get a large cutting board and a sharp fillet knife.
If your fish is alive when you're ready to clean him you'll need to stun him so he won't squirm during the process.
To do this,hold him by the tail and whack him against the cutting board a few times.
The next step is my least favorite, cutting off the head. Hold the fish firmly by its middle and just above the fin saw a few times to get through the bones, the head will come off easily after the bones are broken.
After the head is off the guts need to be removed. To do this, flip the fish over and with the tip if your knife or a pair of kitchen shears slice or cut down to the anus(a small hole near the tail of your fish)being careful not to pierce any of the organs.
Use your hands and pull out all of the guts. You can bury or compost these, we fed them to our pigs.
Cat fish have no scales,however most other fish do. There are de scalers that you can buy at sporting goods shops or with a sharp knife, scrape your fish against the scales until they are all removed.
Other than cat fish I usually leave the head on.
When your fish is gutted, beheaded,and descaled, rinse it well in cool water.
Place it on ice until you are ready to cook it.
Sunday, April 27, 2014
Pine Needle Basket
Yesterday I finally finished the pine needle basket that I had been working on for over a year.
I have some projects that have taken longer due to lack of time or loss of interest. However this one was due to lack of materials.
My home town in Florida is just filled with the most wonderful long, thick, and dark brown pine needles.
I can gather enough to complete a good sized basket in a matter of minutes.
Here in Virginia everyone tells me that they have plenty of pine needles. I have a forest of them myself. Sorry to complain, but these pine needles are a pain in the butt to work with. They are skinny,brittle,and half the size of my Florida pine needles.
If any of my Virginia friends know what Florida pines are like and thinks they have the right kind of tree please let me know, or if any of my generous readers back home have a tree and a box,I would be deeply indebted to you for sending me some. In the mean time, I plan to experiment with sage grass.
Pine needle basketry is my absolute favorite craft and so simple. It is more appropriately called coiled basketry; any pliable material can be used including tall grasses,straw,cattails, and rushes. I just happen to think that the most aesthetic medium is pine needles.
I will will be starting a new coiled basket in a few days(or weeks) and demonstrate step by step on how to sew a coiled basket. For today, I will do things backwards and show you finish a coiled basket. Often times thrift shops and garage sales are laden with baskets that could use a little refinishing.
There are a few different ways to add waterproof and shine to a basket. My favorite is using beeswax and paraffin.
First, I put on leather gloves and run my hand around the basket to remove any sharp ends or loose needles.
After the basket is smooth I shred equal amounts of paraffin and beeswax and melt them in a double boiler or makeshift double boiler.
The next step is to thoroughly coat the basket with the melted wax. I use a cheap short bristled paint brush.
It will look really ugly. Don't worry, it'll melt.
To melt the wax set your oven on the absolute lowest setting and place the basket on a newspaper or brown paper lined baking sheet. Put the basket in the oven and check every 5 minutes to see if all the wax is melted into the needles.
When the wax is melted remove your basket from the oven and rub it real well with a rag.
Allow it to cool and polish it with the rag once again. It should be shiny and firm.
Alternatively, you can melt the wax in a hot car or greenhouse. Be creative!
Tuesday, April 22, 2014
Italian Fried Doghnuts
Lent officially ends the Saturday before Easter at noon so armed with only an electric I had to think of a sweet treat to make to break our fast.
With the mixer running, add the egg/oil mixture and as much water as you need to make a cohesive dough.
Allow the doughnuts to rise for about half an hour more.
Meanwhile in a deep skillet, frying pan, or deep fryer add the frying oil. Heat the oil to about 400 degrees.
Being careful not to overcrowd them, place the doughnuts in the hot oil. Cook them for about 3 minutes per side until they are golden brown.
When they are cooked, drain them on brown paper for a few minutes.
Finally, sprinkle them with powdered sugar or roll them in cinnamon sugar. They’re also delicious with fresh jam.
These are best served piping hot.
I hope you had a blessed Easter!
Wednesday, April 9, 2014
Once a Month Cooking
I must admit I was a bit disappointed because most of the recipes included ingredients that I was trying to avoid such as condensed soups and bottled barbecue sauces. I was also skeptical about the quality of reheated frozen food. So I returned the book and forgot about once a month cooking for a few years.
I did a little bit of extra cooking and freezing things like chili and lasagna before the births of each of my children but nothing like once a month cooking.
Fast forward to last year amidst moving to a new house/farm, homeschooling 3 children,chasing a toddler, and nursing an infant, and a husband who commuted 1 hour+ to work, I was overwhelmed. Spending an hour every night to get dinner on the table was a real challenge to say the least.
Well I was at the library one night browsing through the cookbooks and I happened to come upon the cookbook that I checked out 13 years prior. I decided that I had to try it, I would just make up my own recipes and use the book as a guide.
I went home and googled once a month cooking and was thrilled to find the website Once a Month Meals.It does a whole seasonal meal plan every month and a variety of menus, traditional, whole food, paleo, diet, gluten free/dairy free, and vegetarian. It has a monthly fee but I figure we save time and money by eating this way so it pays for itself.
Today was my cooking day. I cooked 7 double batch meals. The last few days I put together 7 more. That equals 28 meals total. This usually takes about 10 hours to pull off in one day.
Yes, 10 hours is a long day so you can break it down
Be prepared, few bloggers or writers are brave enough to take pictures of their dirty dishes and let the world see them, but here it is the reason I love once a month cooking. My kitchen only looks this bad once a month....
| nice clean dishes |
Now this is what I have to look forward to all month.